3D printing in the classroom
What is 3D Printing?
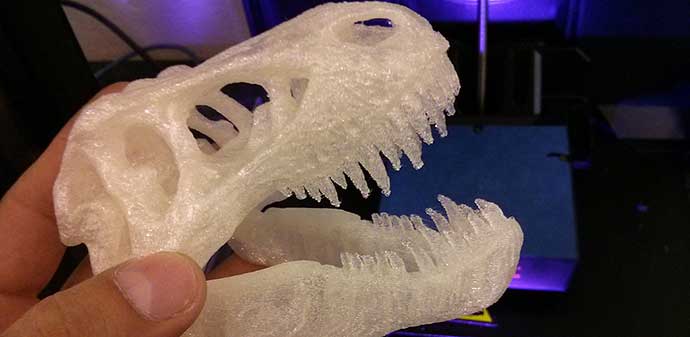
3D printing is a process for making a physical object from a 3D digital model – most printers do this by laying down thin layers of a material on top of each other.
There are many different types of 3D printers. In New Zealand there are two consumer-level technologies available.
- Fused Deposition Modelling (FDM) printers use plastic filaments that are melted and extruded via a print head. It’s very much like a fine-tipped hot glue gun that melts the filament in thin layers, building up the object. This is the most common type of 3D printer found in New Zealand. They print very slowly.
- Digital Light Processing (DLP) printers are a new technology and have recently become available at a consumer-level price. They use a bath of resin which is cured by UV light and a liquid crystal screen. The object is built upside down and ‘emerges’ from the resin bath.
- Advantages: These machines have fewer moving parts, are capable of very fine detail, and they print much more quickly than FDM printers.
- Disadvantages: They’re a lot messier, they emit unpleasant fumes, and the resin is toxic until it’s cured and washed in isopropyl alcohol.
How does 3D printing work?
3D printed objects are built up layer-by-layer, and very complex shapes can be created. The process itself doesn’t generate much waste – unless something goes wrong and you have to throw the whole object away. There are also raft and support elements generated by the slicer software to ensure a successful print. These need to be removed and discarded after printing.
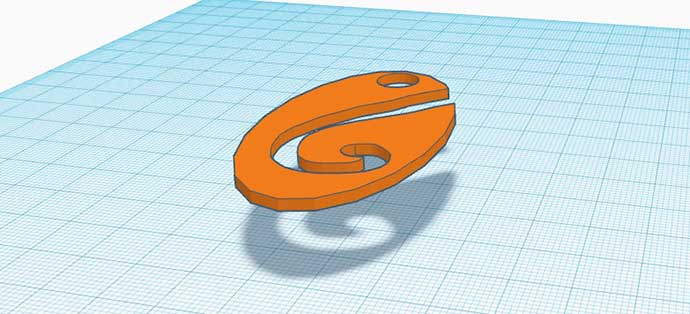
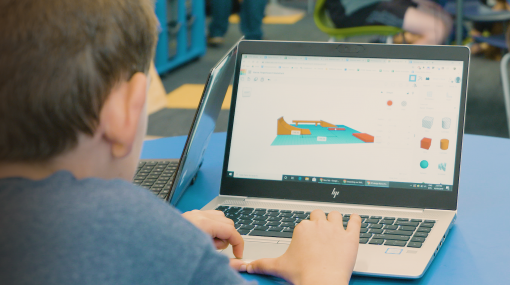
To produce a 3D printed object you need a computer model. 3D models are produced using a variety of applications such as TinkerCad , Sketchup or Blender . Online libraries like Thingiverse or YouMagine allow models created by other people to be downloaded, modified, and printed.
The most commonly used file format for 3D printing is .STL (an abbreviation of stereolithography). This format has become the de-facto standard due to wide adoption by the 3D printing industry and is a safe choice, especially if you are sending files to someone else to be 3D printed. Other common file formats are .OBJ, .AMF and .3MF.
3D modelling is a key skill in today's workplaces and industries
Much of the skill in 3D printing comes from creating digital models which can lead to many areas of employment.
Being a competent creator of 3D models supports future-focused learning
- Architects and engineers produce digital models of their designs for testing and to sell their ideas to their clients.
- Movie and TV productions often use 3D animation, sometimes seamlessly mixed with live action.
- Game designers build whole worlds and characters in 3D.
- Computer modelling has enabled buildings and structures that would be almost impossible to design any other way.
- 3D printing of food, houses and materials like wood and metals is possible now. It’s likely that 3D modelling and printing will increasingly become valuable skills.
- There are positive and negative aspects to the widespread use of 3D printing. It’s important for students to be familiar with the technology so they can make a meaningful contribution to any future discussions on the subject.
"Future focus is about supporting learners to recognise that they have a stake in the future, and a role and responsibility as citizens to take action to help shape that future."
Where is the learning with a 3D printer?
Learning occurs when students design and create objects for a purpose
3D printers are simply a tool, like a photocopier. There is little to be learned from choosing a 3D model designed by someone else and watching it print. Learning occurs when students use this tool to design and create objects for a purpose.
3D printing helps students conceptualise and visualise their designs as they progress through the development stages from a sketch to the final product. Students can experiment with ideas, problem solve, and grow their creativity.
While the printing itself isn’t usually the focus of learning, it’s important to note that the ability to turn computerised 3D models into actual physical objects is a highly motivating, tangible outcome for students.
Integrating 3D printing across learning areas
While 3D printing is most relevant in the Technology learning area, many learning areas can benefit from integrating 3D modelling and printing. You can plan an integrated STEAM approach, or use the printer within a specific learning area as needed.
The NZ Curriculum values of ecological sustainability, and innovation, inquiry, and curiosity are also relevant.
Kits that contain electronics, wheels, and metal parts are available for purchase. They also ship with .STL files so the students can 3D print the plastic parts themselves. This is a useful way to introduce the idea that the whole project doesn’t need to be 3D printed.
Myles Webb from Auroa Primary School shares how year five and six students have used 3D printing to create solutions for problems in their school community.
Technology
In Technology, 3D printing supports learning across all three strands as well as the digital technologies progress outcomes.
Technological practice
- Students understand the attributes of a 3D printer, see the printer as a potential resource, and incorporate it into their planning.
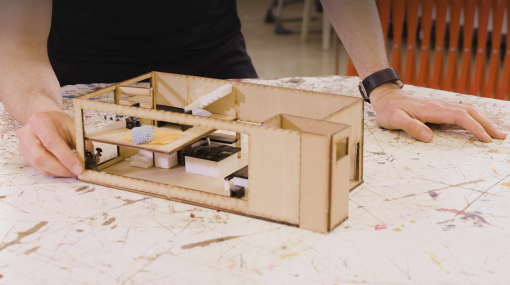
- 3D printed parts can form a small piece of a project – for example modelling a house in wood or cardboard and using the 3D printer to produce a curved staircase or kitchen sink. This approach keeps the 3D-printed parts small so more students have the opportunity to print their ideas. Using the 3D printer to print the complex objects, and using other materials to model simple elements demonstrates using the properties of tools and materials to their best advantage.
- Students can use printed objects, or 3D models as a way to test ideas and get feedback from their stakeholders.
Technological knowledge
- Students understand how the rapid cycle of printing a prototype » testing » altering the 3D model » and printing again allows rapid development of a solution.
- Properties of the printed material can be used to their advantage, and students can alter their 3D models to ensure the printed object has the attributes required in their brief. They understand how an idea needs to be modified to work successfully in a 3D printer.
The nature of technology
- 3D printers are a potentially disruptive technology that could fundamentally alter the way manufacturing is done. In the future, we may 3D print many of the objects we use in daily life.
- Understanding the 3D printing process can lead to interesting conversations about the impact on society when we can just print whatever we want. Are there objects we shouldn't be allowed to print? Other considerations include the environmental impacts of all the plastic, or the reduction in shipping when a 3D model can be sourced globally but printed locally.
Designing and developing digital outcomes
- A 3D model created on a computer is an example of a digital outcome. It can be evidence of learning in the designing and developing digital outcomes progress outcomes. Once printed, the student has a materials outcome as well as a digital one.
Getting started with a 3D printer
Creating bespoke parts for prototyping
Technology projects often require prototypes to be created. Students can design and print parts that are customised to the particular outcome they are trying to achieve.
If a student is building a machine using a single board computer such as a micro:bit, they can design and print a custom case to hold the board. The case can be bespoke and perfectly adapted to their individual project with channels for wiring, mounting points for screws and holes for access to buttons. This sort of prototyping was virtually impossible for schools in the past.
When designing and developing a processed outcome, custom food moulds and other containers could be produced to satisfy particular briefs.
Testing with stakeholders and end-users
Making sure your technology solutions are fit for purpose and meet the needs of your stakeholders is a vital part of the technology design process. Being able to manufacture the same object, but in a number of variations, enables students to test their designs with a group, or with the stakeholder/end-user. Objects can be immediately tested in the real world. For example, they can be tested to see if they fit in the hand of the user, or are able to be safely mounted on a bicycle. The 3D models can be adjusted as a result of the testing and a new version can be printed and re-tested.
Authentic contexts
When identifying an authentic context to drive learning opportunities, consider these questions:
- what needs do we have in our school or community?
- what are our tamariki passionate about or interested in?
- what exists already and how does it work?
- what are our initial ideas or prototypes?
- is our design ethical? What could the repercussions of this be?
Technology spotlight: Authentic contexts and taking into account end users
Mathematics
Creating 3D computer models supports learning in mathematics.
- Students develop important skills such as accurate measurement of length and angles in a practical context.
- Complex shapes can be built from simple shapes which are joined or subtracted from each other.
- Spatial awareness develops from mapping the 2D screen into a 3D space.
- Students learn about the properties of various shapes, and how those properties work in the real world once they are printed.
English and Visual Arts
3D models can be created according to descriptions from books, and then printed. This requires close reading so students can translate a fictional object, building, or character into reality. They can create, in the real world, what they imagined as they read the text.
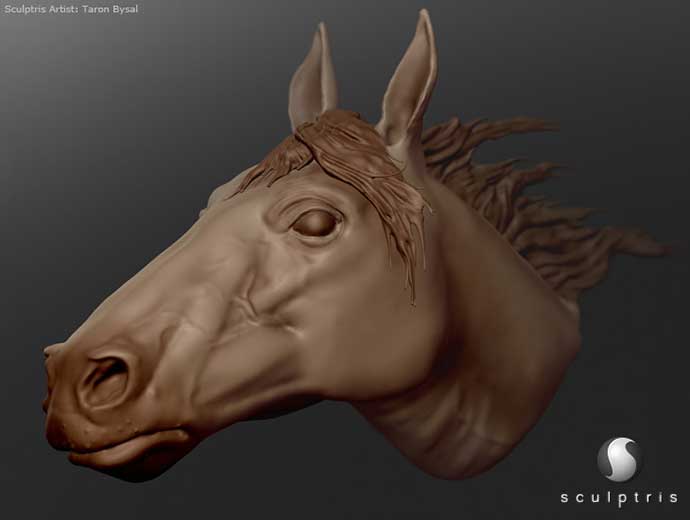
Free software such as Zbrushcore allows sculpting of a virtual ball of clay – pushing, pulling, and smoothing the surface to create an organic-looking model. Combined with Meshmixer (free), the Sculptris models can be 3D printed.
3D printing allows complex shapes that would be difficult to create any other way. It’s as easy to print a complex shape as a simple one. If you can model it, the printer can print it (in most cases).
History
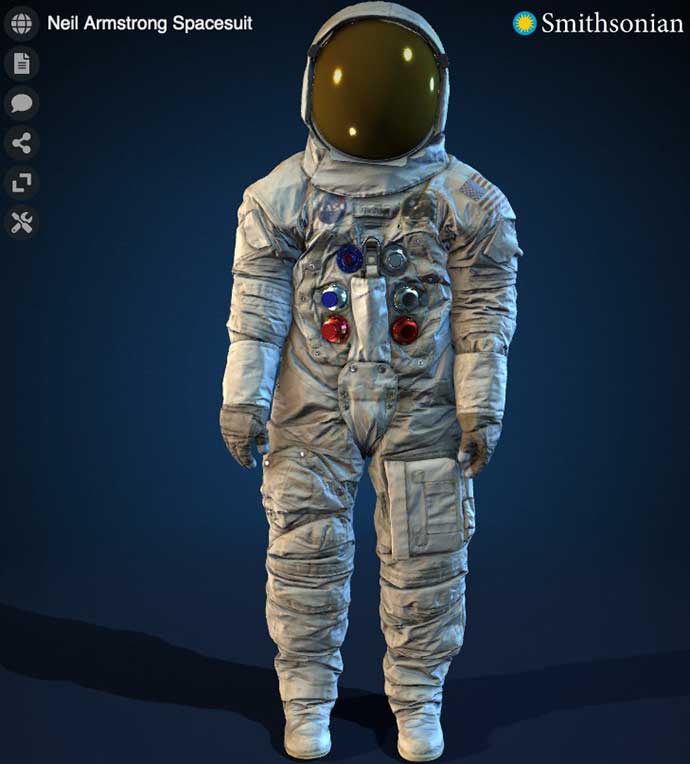
Institutions such as the Smithsonian make high resolution 3D scans available. These can be printed by students on 3D printers and then examined, hands-on.
Geography
Maps can be rendered in 3D by using contour lines - for example, this lesson where students 3D print Taranaki . There are some very accurate 3D models of parts of New Zealand made with data from the US space programme. These are available on Thingiverse .
Science
It’s often easier for students to understand how objects work when they can examine them physically.
Many 3D models are available to print and use at all levels of the school.
In primary schools, objects from books or characters from stories can be printed and handled.
In secondary school:
- models of molecules – and arrangements of molecules – could be produced in chemistry
- biological structures such as bones, cells, and complex structures like a knee could be replicated
- custom environments created to test the preferences of insects
- self-watering pots and other plant-growing environments can be custom-made to test different versions.
There is a collection of apparatus for physics experiments on Thingiverse. These designs can be printed and used, or modified to fit other purposes.
Aspects to consider before you purchase
While 3D printers are getting cheaper, it’s still a significant purchase for most schools. The following advice is adapted from Choosing the right digital device (a guide developed by the Connected Learning Advisory). Use it to plan how you will maximise the use of your 3D printer.
Reasons for purchasing
- Why is the school purchasing this device?
- What will it allow that we can’t already do another way (LEGO, cardboard etc.)?
Support learning
Consider how the 3D printer will:
- support achievement of the school’s goals and vision for learning in an inclusive way
- impact on professional learning and technical support needs
- facilitate flexibility and personalisation
- fit into the current pathway for students from new entrants to year 13 in your community.
Management aspects
- Who will be able to access the printer?
- Will students be printing directly, or via a staff member?
- How will large numbers of printing requests be handled?
- How will 3D modelling be introduced and taught to students?
Maintenance and training
- What professional development and training is required?
- Who will care for and maintain the printer?
- Who will manage the filament and purchase new filament?
- How will the filament be stored (it likes to stay cool and dry).
Common issues and problems
You should expect to encounter these issues sometimes, and they can be challenging if you have time pressure or there is high demand for use of the printer.
- 3D printers print very slowly. It can take several hours to complete printing of a large object, particularly if the printer is set to a high-quality setting. If you have a class of 30 students, all of whom want to print, it can take many days to get through the waiting list.
- Sometimes the whole print goes wrong. If the object detaches from the print bed, the nozzle can drag it around inside the printer laying layers and layers of thin spiderweb-like filament. If the model has large overhangs or other shapes that are impossible to print, the printer will have a go anyway. The resulting mess can represent many hours of wasted time and filament. When this happens, you have no choice but to re-print your model, perhaps tweaking the settings, or re-orienting the model to eliminate potential issues.
- The nozzles need to be checked regularly or they can block. Sometimes they block anyway. If this happens, there will be a procedure from the manufacturer to remove and clean the nozzles. It's similar to a paper jam in a photocopier, it happens occasionally even if your machine is well maintained. Anything that was printing when the nozzle blocked will need to be reprinted.
Sorry, no items found.
Help getting started
The Otakou STEAM cluster in Otago has a 3D design page with tutorials, links and ideas.
Enabling e-Learning pages (TKI)
Designing and printing 3D models
Existing models to print
- Thingiverse — A huge collection of 3D models. They can be downloaded and printed as-is, or modified in 3D modelling software.
- Yeggi — A meta-search engine that allows you to search a number of sites for 3D printable models.
- YouMagine — A library of approximately 15,000 3D models for download.
Software to create your own 3D models
- Tinkercad — A great entry-level 3D modelling package.
- FreeCad — Free, open source, powerful 3D design software with a growing number of downloadable add-on features.
- Meshmixer — Mash, mix, sculpt, stamp, or paint your own 3D designs. Available on our iMacs.
- Sketchup — Used for general 3D modelling but excels with geometric shapes. The software is easy to learn and can be extended with plugins. SketchUp provide a grant which delivers free licences to New Zealand schools
- Sculptris — Sculpting with a virtual lump of clay. Capable of much more organic models than by combining shapes. There is a learning curve.
- Blender — A long-running, open source 3D creation project. Blender is powerful, but more difficult to learn.
Places to access a 3D printer
- Te Papa's Hīnātore Learning Lab includes 3D printers in its suite of tools
- Christchurch library offers 3D printing in its MakerSpace
- Whangarei Central Library has a 3D printing service
